|
Attractively formatting Project Gutenberg texts
|
 |
|
Attractively formatting Project Gutenberg texts
|
|
GutenMark Tutorial
Printing or converting to PDF, via HTML
Printing or converting to PDF, via LaTeX
Manual Tweaking
GutenMark [options] [inputfile [outputfile ]](Depending on your computer's setup, it may be necessary to say "./GutenMark" rather than just "GutenMark".)
GutenMark tomco10.txt tomco10.htmlOther possibilities are to use the program in "filter" style:
GutenMark tomco10.txt > tomco10.htmlGutenMark is intended to be fully automatic, but there are quite a few command-line options that are available anyway.
or
GutenMark < tomco10.txt > tomco10.html
|
|
|
|
|
(20020808 and later.) Allows you to specify the name of
the author of the etext. (By default, GutenMark will try
to deduce the author's name from the etext itself.) If the
author's name contains any blank space—and I bet it does—then
you'll want to quote it. For example,
GutenMark "--author=Mark Twain" tsawyer.txt tsawyer.htmlThis is, perhaps, a more interesting option for LaTeX output than for HTML output. |
|
|
(20020809 and later.) By default, GutenMark automatically converts ALL-CAPS to italics (e.g., all-caps). Many other other types of markup are converted to italics as well, of which the best-known is probably _underscores_ (which becomes underscores). These various methods can be intermixed within a document. However, it is undesirable to mix-and-match ALL-CAPS with the other methods, because if explicit markup such as _underscore_ is present, it is usually intended that ALL-CAPS remain ALL-CAPS. GutenMark has a rudimentary means of determining for itself when this situation arises, and automatically suppresses the conversion of ALL-CAPS. However, this detection method is not perfect, and you can manually eliminate the ALL-CAPS conversion by using the "--caps-ok" command-line switch. |
|
|
(20020713 and later.) Allows you to specify an
alternate GutenMark configuration file. GutenMark
looks for its configuration file in various locations:
Important note: For installations performed by one of the installer programs (version April 2008 or later), the executables are stored in the "binary" subdirectory of the installation directory, while the configuration file is installed in the "GutConfigs" subdirectory of the installation directory. For such an installation, use of the "--config" switch is therefore mandatory when running GutenMark from the command line, since the configuration file is no longer present in any of the directories searched by default. |
|
|
(20011122 and later.) Creates a log file,
GutenMark.log, from which certain internal operations of GutenMark
can be examined. It also causes the files GutenMark.native.gz and
GutenMark.foreign.gz to be created; these are wordlists containing only
the words that actually
appear in the source file. These supplementary output files are
useful
only for developers. Note: The log files are created in the directory containing the source text. |
| --first-capital | (20011209 and later.) By default, if GutenMark finds the first word of a chapter in ALL-CAPS, it simply fixes the capitalization of the word. With the '--first-capital' option, it instead allows the first word of the chapter to remain in ALL-CAPS. (However, it does not convert such a word to ALL-CAPS if it is not already.) Cannot be used with the '--first-italics' switch. |
| --first-italics | (20011209 and later.) By default, if GutenMark finds the first word of a chapter in ALL-CAPS, it does not italicize the word as it would with other ALL-CAPS words. With the '--first-italics' option, it treats the first word of the chapter just like all other words and italicizes it if it had been in ALL-CAPS. Cannot be used with the '--first-capital' switch. |
| --force-numeric --force-symbolic |
(20011210 and later.) You can use this switch if your browser displays special characters (like soft hyphens) in a funky way. Explanation: special characters are encoded in HTML either symbolically (such as "‘" for a left single-quote) or numerically (such as "‘" for a left single-quote). The symbolic form is easier for people who want to read the raw HTML (rather than just viewing it in a browser) and is perfectly correct—but browsers are more consistent at supporting the numeric form. By default, the numeric form is used; the '--force-symbolic' switch can change to the symbolic form instead, and would be recommended if you intended to add manual markups to the HTML. (The '--force-numeric' switch actually has no use an any released version, and is present only for development purposes, but it doesn't hurt to use it.) |
|
|
Displays a list of the available options. |
|
|
(20011126 and later.) Thanks to Joe Cherry, GutenMark can create LaTeX output as an alternative to HTML. In early versions this was quite buggy, but in versions 20020616 and later begins to be very satisfactory for most texts except those with a large amount of verse. |
|
|
(20020805 and later.) Normally, each heading detected by GutenMark is treated as the beginning of a chapter (with the LaTeX "chapter*") markup. If '--latex-sections' is used, then they are treated as sections (LaTeX "section*") instead. An additional distinction is that for chapters, GutenMark adds markup to change the page headers on a chapter-by-chapter basis, whereas for sections it does not. For these reasons, chapters (the default) are more useful if the text is subdivided into a small number of large chunks, whereas sections are more useful if the text is subdivided into a large number of small chunks. The LaTeX may be manually edited afterward, if desired, to group sections into chapters. Of course, it would be more useful if GutenMark could recognize these distinctions for itself, and intermix chapter headings and section headings within the same document. Perhaps someday it will be able to do so. |
| --mdash-size=N |
(20021122 and later. Updated 20030105)
The
LaTex construct for an mdash is "---". With the --mdash-size
switch,
an mdash is changed any number of hyphens that you like. However,
with
any value other than 3, you are going against what LaTeX wants, and
therefore
may experience problems associated with inappropriate line-breaks
and/or
poor addition of whitespace. |
|
|
(20011125 and later.) By default, GutenMark restores diacritical marks in words for which there is no native equivalent without diacritical marks. For example, suppose the word "Fraulein" appears in an English-language etext. This is not an English word. In fact, it is not a word in any language. The correct (German) word is "Fräulein". This is a systematic problem that appears through almost all PG etexts. GutenMark will notice this kind of thing, and try to restore the word to its proper form. (This is a separate issue from italicizing the word as foreign—see below.) You can turn this feature off with the '--no-diacritical' command-line switch. |
|
|
(20011125 and later.) By default, GutenMark attempts to italicize foreign words—i.e., words not in the native language of the etext. The '--no-foreign' command-line switch turns this feature off. |
|
|
Outputs paragraphs in ragged-right format. The default format is right justified. This option is useful if the htmldoc utility is used to convert HTML to Postscript because htmldoc is (or has been) buggy in regard to right justification. Or, I guess, if you just prefer ragged-right text. |
|
|
(20011109 and later.) By default, GutenMark replaces constructs like "--" with an mdash character. This looks better when printed, but most browsers do a very poor job of rendering mdashes, so that HTML looks better with the original dashes in place. The "--no-mdash" command-line option turns off the mdash conversion. |
|
|
(20020615 and later.) Used only with "--latex". By default, paragraphs are not indented but are separated with blank lines. When "--no-parskip" is used, LaTeX indents the paragraphs and does not separate them with blank lines. |
|
|
(20020118 and later.) This option does not affect the HTML as far as a browser is concerned, but if post-processed by html2ps causes the entire "prefatory area" to be deleted from the Postscript. |
|
|
For software versions 20020808 and later, a table of contents is added to LaTeX output by default. Removes that table of contents. |
|
|
(20020118 and later.) This option does not affect the HTML as far as a browser is concerned, but if post-processed by html2ps causes a page break to be inserted prior to each section heading. |
|
|
(20011122 and later.) GutenMark uses wordlists and namelists to help it perform various tasks (such as identifying which words are in the native language of the etext and which are foreign). A configuration file, GutenMark.cfg, lists the wordlists and defines their search ordering and native/foreign status. The configuration file can contain multiple named profiles, perhaps representing different native languages. The default profile is named 'english', but alternate profiles can be selected using the '--profile' command-line option. If the specified profile is not found in the configuration file, GutenMark uses all wordlists and namelists it can find, in the following order: namelist for name language, all other namelists, wordlist for name language, all other wordlists. Note that using all wordlists and namelists can be quite time consuming, so defining a custom profile is generally a better idea. The configuration file, as distributed, contains profiles "english" (using a small set of wordlists), "none" (using no wordlists), and "english_all" (using all wordlists). |
| --ron |
(20021225 and later, LaTeX only.) Groups
various settings that I (RSB) find personally useful. Includes
--latex, --no-parskip, and --mdash-size=3. Also, provides various
settings that normally
you're expected to provide by manually editing the LaTeX: It sets
the page size to 5.5"x8.5in, margins to 0.75" (but greater along the
spine
for alternating even/odd pages), font to New Century Schoolbook. |
| --single-space | (20011210 and later.) By default two blank spaces are used between sentences or after colons, which is standard editorial practice (at least, in American English). By user request, the '--single-space' command-line switch has been added to reduce this to a single blank space instead. |
|
|
(20020808 and later.) Allows you to specify the title
of the etext. (By default, GutenMark will try to deduce
the title
from the etext itself.) If the title contains any blank
space—and I bet it does—then you'll want to quote it. For
example,
GutenMark "--title=Tom Sawyer" tsawyer.txt tsawyer.htmlThis is, perhaps, a more interesting option for LaTeX output than for HTML output. |
|
|
(20011112 and later.) By default, GutenMark removes Project Gutenberg's file header from the HTML output, in order to insure conformance with PG requirements. The "--yes-header" command-line option causes the PG header to be retained. You need to read the PG header and evaluate for yourself whether retention of the header is legal or desirable for your application. (Removal of the header is guaranteed to be legal.) |
Here is what the complete sequence of steps looked like, in Linux, for converting the sample etext to PDF format:
# Create HTML from the PG etext.Or, in Linux, we could simply have printed it rather than creating PDF, by replacing the final command with
GutenMark bldhb10.txt bldhb10.html
# Create 8.5"x5.5" Postscript, hyphenated, from the HTML.
html2ps -H -f half12schoolbook.rc bldhb10.html > bldhb10.ps
# Create PDF from the Postscript.
ps2pdf bldhb10.ps
# Print the Postscript file.Another interesting thing you can do is to print in booklet format -- two pages on the front and two pages on the back of standard letter-sized paper, with the pages reordered so the whole mess can be folded or cut into half-letter sized pages. This can be done with the freely available PSUtils tools. In Linux, you'd replace the ps2pdf step with this:
lpr bldhb10.ps
# Form the Postscript pages into a "signature":
psbook bldhb10.ps signature.ps
# Combine the pages 2-up.
pstops "2:0L@1.0(8.5in,0)+1L@1.0(8.5in,5.5in)" signature.ps booklet.ps
# Pull off the odd-numbered 2-up pages, in reverse order.
psselect -o -r booklet.ps frontsides.ps
# Pull off the even-numbered 2-up pages, in normal order.
psselect -e booklet.ps backsides.ps
# Print it.
lpr frontsides.ps
... feed the paper back into the printer ...
lpr backsides.ps
Around 200 Project Gutenberg etexts which have been converted into a pretty, printable format by means of GutenMark's LaTeX abilities can be seen here. Be aware, though, that some of these texts are considerably more complex than the typical PG text, and therefore required non-trivial manual editing to appear in the form you see them. For an expert LaTeX user, the amount of manual editing probably would range from less than 5 minutes to about an hour for the linked texts. But no matter how you look at it, the LaTeX approach is more suitable for someone who wants to create a permanent archive of high-quality texts than for someone who wants to quickly throw together something to read on a Palm Pilot. A pseudo-WYSIWYG editor such as LyX is very helpful in this process and is much easier for the novice than directly editing the LaTeX files. See www.lyx.org . LyX is available for free, for Linux, Windows, and Mac OS X.
In Linux, fortunately, it quite often happens that TeX/LaTeX tools and LyX are provided free with the Linux distribution, and perhaps even automatically installed. Here, for example, is what the processing for the sample etext looks like on my iMac running SuSE Linux:# Convert the etext to LaTeX format.The various other tricks mentioned in the previous section (creating booklets and so forth) can be accomplished quite easily, simply by converting the PDF to Postscript and vice-versa.
GutenMark/LinuxPPC/GutenMark --latex bldhb10.txt bldhb10.tex
# Convert the LaTeX to PDF format.
pdflatex bldhb10.tex
I am less familiar with using LaTeX in the Windows environment, but
it is very possible to do so. Here is a mini-howto
on installing LaTeX in Win32 from GutenMark user John Wells
that you may find useful. My own
recommendations are provided in the next section.
How to perform this tweaking is a matter of taste. While it is possible to edit either HTML or LaTeX in an ordinary text-editing program, it is certainly much easier to do so in a WYSIWYG editor. Quite often, all that is required is a quick scan through the text to catch anything that really leaps out as objectionable. For editing HTML, I personally prefer freeware like Netscape/Mozilla. But there are many available choices, obviously, including even Microsoft Word.
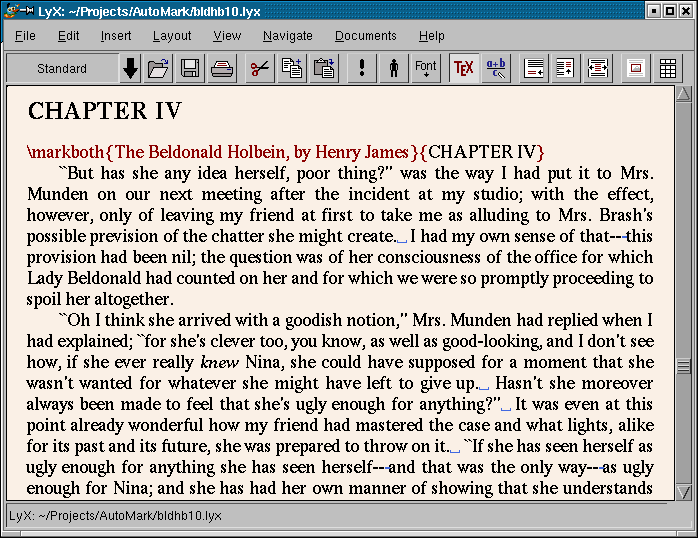 For tweaking LaTeX, I'd
suggest the free program LyX (www.lyx.org),
which is a near-WYSIWYG editing environment. I've provided a
screenshot—which you can enlarge by clicking on it—of LyX being
used to edit LaTeX created from the sample etext.
For tweaking LaTeX, I'd
suggest the free program LyX (www.lyx.org),
which is a near-WYSIWYG editing environment. I've provided a
screenshot—which you can enlarge by clicking on it—of LyX being
used to edit LaTeX created from the sample etext.
With that in mind, here's a list of things that I find objectionable in GutenMark HTML output, roughly in descending order of importance. I would hazard a guess that only the first two items are truly objectionable to most people.